

Want the same movie, game, slideshow, or security feed on more than one screen? An HDMI audio video splitter is the little box that makes that happen. It takes one HDMI signal and sends it to two, four, or even more displays. Simple. Neat. Very handy.
TLDR: An HDMI audio video splitter lets one HDMI source play on multiple screens at the same time. You plug your source into the splitter, then connect each display to the splitter with HDMI cables. It is great for TVs, monitors, projectors, shops, classrooms, gaming rooms, and events. Pick one that supports your resolution, audio format, and number of screens.
What Is an HDMI Audio Video Splitter?
An HDMI audio video splitter is a device that copies one HDMI signal and sends it to multiple outputs. Think of it like a pizza slicer. You start with one pizza. Then you cut it into slices. Each slice goes to a different person.
With a splitter, the “pizza” is your video and audio signal. The “people” are your TVs, monitors, or projectors.
It does not create different content for each screen. It shows the same thing on every connected display. So if your laptop is showing a slide deck, every screen will show that same slide deck. If your game console is playing a racing game, all screens show the race.
That is the key idea. One source. Many screens. Same content.
Why Would You Use One?
There are many fun and useful reasons to use an HDMI splitter. Some are simple. Some are super cool.
- Home movie night: Show the same film on two TVs in different rooms.
- Gaming setup: Display your game on a TV and a capture monitor.
- Classroom teaching: Send a laptop screen to several classroom displays.
- Business presentation: Show slides on multiple screens at a meeting.
- Retail store: Run the same ad video on several shop screens.
- Sports bar: Put one big game on many TVs at once.
- Security room: Show a camera feed on more than one monitor.
- Church or event hall: Send video to projectors and lobby displays.
It is a small gadget with big “wow” power.
How Does It Work?
The setup is easy. You have three main parts.
- The source: This is where the video comes from. It could be a laptop, Blu-ray player, game console, streaming box, or camera system.
- The splitter: This is the middle box. It copies the signal.
- The displays: These are your TVs, monitors, or projectors.
The source connects to the splitter using an HDMI cable. Then each display connects to the splitter using its own HDMI cable. If the splitter needs power, you plug it into the wall.
That is it. No magic spell needed. No wizard hat required.
A Simple Example
Let’s say you have one laptop. You want to show a training video on three TVs in a small office.
You would do this:
- Plug one HDMI cable into your laptop.
- Plug the other end into the HDMI input on the splitter.
- Plug three HDMI cables into the HDMI outputs on the splitter.
- Connect those three cables to the three TVs.
- Turn everything on.
- Select the correct HDMI input on each TV.
- Play the video.
Now all three TVs show the same training video. Nice and tidy.
Important: Splitter vs Switch vs Matrix
These gadgets sound similar. But they do different jobs. This can be confusing. So let’s make it simple.
- HDMI splitter: One source goes to many screens. Same content on all screens.
- HDMI switch: Many sources go to one screen. You choose which source to watch.
- HDMI matrix: Many sources go to many screens. You can send different sources to different screens.
If your goal is to show the same picture on multiple displays, you want a splitter.
If you want Screen A to show a game console and Screen B to show a laptop, a basic splitter will not do that. You would need an HDMI matrix or a different setup.
Choosing the Right HDMI Splitter
Not all splitters are the same. Some are tiny and simple. Some are powerful and built for big systems. Here is what to check before you buy one.
1. Number of Outputs
Count your displays. Do you need two screens? Four? Eight?
Splitters are often labeled like this:
- 1×2: One input, two outputs.
- 1×4: One input, four outputs.
- 1×8: One input, eight outputs.
If you have three screens, a 1×4 splitter is fine. You do not have to use every output.
2. Resolution Support
Check the resolution. This is very important.
If your source is 4K, your splitter should support 4K. If you want 120Hz gaming, check for that too. Some older splitters only support 1080p. That may still be fine for many uses. But it will not give you sharp 4K video.
Common options include:
- 1080p: Good for basic TV, presentations, and older screens.
- 4K at 30Hz: Good for movies and simple display use.
- 4K at 60Hz: Better for smooth motion and modern setups.
- 8K: Advanced setups. More expensive. Needs the right cables and screens.
For most people, 4K at 60Hz is a safe modern choice.
3. Audio Support
Because this is an audio video splitter, it carries sound too. HDMI can carry both picture and audio in one cable.
Check if the splitter supports the audio format you need. Many support common formats like stereo and 5.1 surround sound. Some also support Dolby formats. If you have a home theater receiver, soundbar, or surround system, read the product details carefully.
Also remember this. If your screens have different audio abilities, the system may choose a simpler format that all displays can understand. This is normal.
4. HDCP Support
HDCP is copy protection. It appears with many streaming boxes, Blu-ray players, and game consoles. If your splitter does not support the needed HDCP version, you may get a black screen. Nobody likes the black screen of doom.
Look for HDCP support in the specs. For 4K streaming, HDCP 2.2 or higher is often needed.
5. Powered or Passive
Some cheap splitters do not use power. These are called passive splitters. They may work in very simple cases. But they are not always reliable.
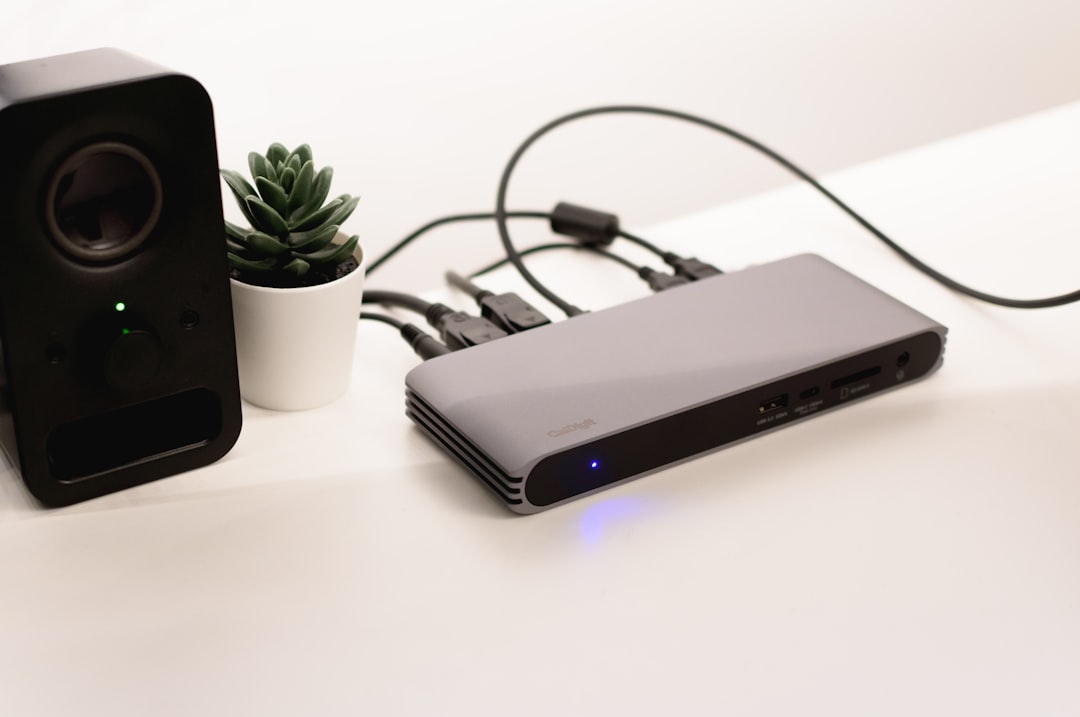
A powered HDMI splitter is usually better. It uses a power adapter. It repeats and strengthens the signal. This helps with longer cables and multiple displays.
If you want fewer problems, go powered.
How to Set It Up Step by Step
Ready to build your mini screen empire? Follow these steps.
- Turn off your devices. This is a safe habit.
- Place the splitter near your source. This keeps the first HDMI cable short.
- Connect the source to the splitter input. Use a good HDMI cable.
- Connect each display to an output. Each display needs its own HDMI cable.
- Plug in the splitter power adapter. Do this if it is a powered model.
- Turn on the displays. Choose the correct HDMI input on each one.
- Turn on the source device. Wait a few seconds.
- Test the picture and sound. Play a video or open a presentation.
If everything is working, celebrate. Maybe do a tiny dance. You have earned it.
Tips for Better Results
HDMI splitters are simple. But a few smart choices can make them work much better.
- Use quality HDMI cables. Cheap or damaged cables can cause flickers.
- Keep cables short when possible. Long cables may weaken the signal.
- Match your displays if you can. Similar TVs or monitors make setup easier.
- Check the lowest display resolution. The splitter may use the resolution supported by all screens.
- Restart devices if needed. HDMI handshakes can be picky.
- Use powered splitters for serious setups. They are more stable.
Here is a common surprise. If you connect one 4K TV and one 1080p TV, both screens may show 1080p. Why? Because the splitter wants to send a signal that both displays can handle. It plays nice with the smallest kid in the group.
What About Long Distances?
HDMI cables have limits. A short cable is easy. A very long cable can be tricky.
For longer runs, you may need:
- Active HDMI cables: These boost the signal.
- HDMI extenders: These send HDMI over network cable.
- Fiber HDMI cables: These are great for long, high quality runs.
If you are wiring a large hall, school, bar, or building, do not guess. Plan the cable lengths first. Then choose a splitter and cable type that fit the job.
Can You Use It With a Projector?
Yes. A projector can be one of the displays. This is useful for events, classrooms, worship spaces, and movie nights.
For example, you can send a laptop signal to a projector and a monitor at the same time. The projector shows the crowd. The monitor helps the presenter. Everyone wins.
Just make sure the projector supports the same resolution as the other display. If it does not, the splitter may reduce the output to match it.
Can You Use It for Gaming?
Yes, but choose carefully. Gamers care about smooth motion and low delay. If you play fast games, look for a splitter that supports your needed resolution and refresh rate.
For casual gaming or streaming, many splitters work fine. For competitive gaming, check for:
- 4K at 60Hz or higher
- Low latency design
- HDMI 2.0 or HDMI 2.1 support
- HDR support
You can also use a splitter to send gameplay to a TV and a capture device. This is great for streaming or recording.
Common Problems and Easy Fixes
Sometimes HDMI acts like a sleepy cat. It ignores you until you poke it the right way. Here are common problems and fixes.
No Picture
- Check that all cables are fully plugged in.
- Make sure each display is on the right HDMI input.
- Restart the source, splitter, and displays.
- Try a shorter HDMI cable.
- Check HDCP support.
No Sound
- Check the volume on the source and display.
- Make sure audio output is set to HDMI.
- Try stereo audio instead of surround sound.
- Test with one display first.
Picture Flickers
- Use better HDMI cables.
- Lower the resolution to test.
- Use a powered splitter.
- Avoid very long cable runs without boosters.
One Screen Works, Another Does Not
- Swap the HDMI cables.
- Swap the splitter outputs.
- Check the resolution limit of the screen that fails.
- Update your source device settings.
Best Places to Use an HDMI Splitter
An HDMI splitter is useful in more places than you might think.
- At home: Share one streaming box with two TVs.
- In a shop: Run the same promo video all day.
- In a classroom: Make lessons easy to see.
- In a gym: Show schedules, classes, or sports.
- At a wedding: Send a video feed to screens around the venue.
- In an office: Display dashboards or meeting content.
It is not a glamorous tool. But it is a very useful one. Like a good extension cord. Or tape. Or snacks.
Final Thoughts
An HDMI audio video splitter is one of the easiest ways to show the same content on multiple displays. It keeps things simple. It saves time. It makes your setup look more professional.
Just remember the big rules. Choose the right number of outputs. Match the resolution. Check audio and HDCP support. Use good cables. Pick a powered splitter when you want reliability.
Once it is set up, you can sit back and enjoy the magic. One device can feed many screens. Your movie, slideshow, game, or ad can appear everywhere at once. That is not just useful. It is pretty cool.